Reading the Display
List Display (home screen)
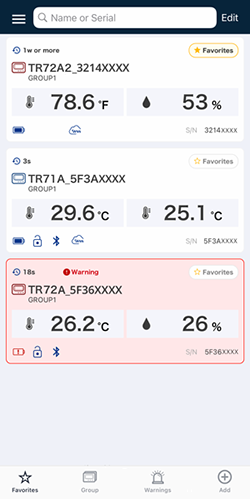
The home screen displays a list of registered devices and updates the information (such as device status and measurements) while the screen is open.
For how to add devices to the app, refer to [Usage by Communication Method].
Listing Details
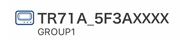
Device Name / Group Name
The device name and group name can be changed in Name Settings. Default Setting:
Devoce Name: Model_Serial Number
Group Name: GROUP1
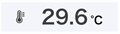
Measurement Reading
This area is also used to display the following.
Hyphens: Indicates that measurement is not possible due to a sensor error (No sensor connected, improper connection, damaged, etc.)

LOCK: Indicates that the device is locked in Security Setting by another user. Data viewing and communication are not available.
- The unit of temperature (°C or °F) can be changed in [Other Settings].
Status Icons
Indicates the status of the device during communication. (See: Status Icons)

Favorites
Tap to select (or deselect) the star icon. The loggers that have been selected as Favorites will appear at the top of the list.
- You can also sort the favorites.

Data Refresh Info
Shows the time elapsed since the update.

Warning
Indicates that the device is in a warning state.
- Upon recovery the display will return to normal. (For the TR71A/75A in Vaccine Mode, however, this will remain on until you clear the warning manually. Refer to [Device Settings] - [Clear ALM Display] - [Loggers in Vaccine Mode] for details.)
- You have the option to receive sound and vibration notifications for warnings on your mobile device. To make the settings, go to the menu
 (in the upper left corner of the home screen) - [App Settings] - [Warning Notification].
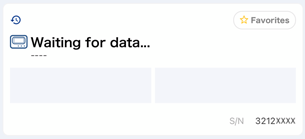
Waiting for data...
This message will be displayed under the following conditions:
- The device is added to the app but no data is received via Bluetooth.
- The device is registered to the WebStorage account but no data is uploaded.
Devices registered to the T&D WebStorage Storage should be added to the app using the following procedure.
- Tap on [Waiting for data...] to open the info screen for the device.
- Tap
 to connect. The [Add Device] screen will open.
 - Add the device by entering its registration code and tapping [Apply].
- The app will collect data from the device and plot a graph.
Other Menus

Edit
You can Edit the List, including deleting and rearranging the devices.

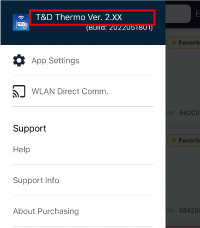
Menu
The menu contents are as follows:
The menu contents are as follows:
App Settings: This includes the Account Management for T&D WebStorage Service and Warning Notification Settings. *
WLAN Direct Communication: Menu available for the TR-7wb and TR-7wf (For details refer to [Usage by Communication Method] - [Device Configuration and Data Collection via WLAN Direct Communication (wb/wf)].)
Help: Opens Help
Support Info: Link to the latest information on T&D products
About Purchasing: Link to the Distributor List
* It is possible to set your mobile device's alarm sound and/or vibration whenever a warning notification is received.

Search
Search by Group Name, Device Name or Serial Number and display found loggers in list (partial match included).
On Android, tap the search icon (![]() ) and enter a keyword.
) and enter a keyword.
List Sorting
You can sort the device list according to an available criteria. (See: Sorting the List)

Add Device
You can Add Devices to the app (and T&D WebStorage Service).
Status Icons
The color of the icons depends on the status of Bluetooth communication.
![]() (Blue): In communication range
(Blue): In communication range
![]() (Gray): Out of communication range
(Gray): Out of communication range

Battery Level
Indicates the battery status in four levels:
 Sufficient Battery
 Less than 50%
 Very Low
 Change Battery
- A low battery may cause communication errors.
- TR7A loggers: Recorded data will be retained even if battery power is completely gone.
- TR-7wb/nw/wf loggers: Continuing to use the unit without changing the batteries could lead to loss of recorded data.

Lock (Security) *A/wb only
Indicates the security status for Bluetooth communication. (See: [Security Setting])
 (ON): Can only be viewed and configured by entering the set passcode.
 (OFF): No restriction

Bluetooth
This will appear in blue when Bluetooth communication is possible.
If the icon is off, the device needs to be added to the app. Follow the steps below.
- Tap on the device in the list to open the info screen.
- Tap to connect. The [Add Device] screen will open.
- Add the device by entering its registration code and tapping [Apply].

WebStorage
Indicates that the device is registered to T&D WebStorage Service.
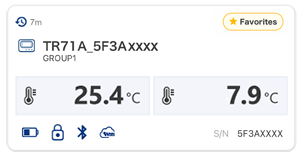
Device Info Screen
Tapping on a device in the list display (home screen) opens the screen as shown below.
To go back to the previous screen, tap![]() .
.
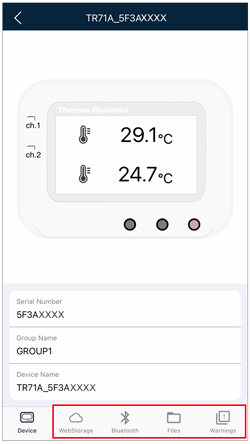

WebStorage
Tap here to access your WebStorage account.
- This will retrieve recorded data (sent via Auto-upload feature) and display in graph.
- T&D WebStorage Service also allows you to make or change the device settings on the web browser.
If it does not work properly, check the following possible causes.
- The mobile device is offline.
- The incorrect account is selected.
(See: [Editing Device List] - [WebStorage Accounts]) - The account password has been changed.
(You need to re-register the account. See: [Set up a T&D WebStorage Service Account])) - The device's wireless LAN setting is turned off or there is a network connection error. (See: [Wireless LAN and Network Settings])
- The incorrect data destination is selected. (Refer to [Clock Settings and Data Destination])

Bluetooth
Tap here to communicate with the logger via Bluetooth.
- The app will collect recorded data and display in graph, which can then be stored in the mobile device.
- You can output the data in a report.
- You can change the device settings.

Files
Use this to open files stored in your mobile device.

Warnings
Here you can access T&D WebStorage Service to check warning histories.
- Available for devices configured with Auto-upload and Warning settings
File List Screen
This is where you can access the data files stored on the mobile device by tapping the Download icon.
On the Device Info Screen, tap [ Files].
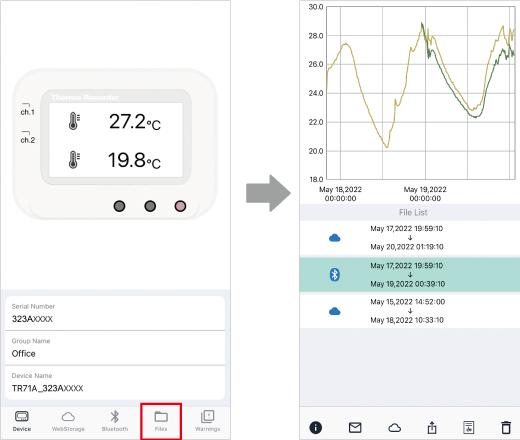
- The mark (
 ) in the file list indicates the communication method used to collect the data.
 - At the top of the list will appear the most recently saved data.
- Select and tap a file to view in graph. By rotating your mobile device, the graph will go into landscape mode and graph operations can be performed.

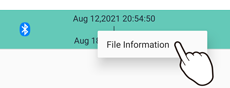
File Info
This shows the date and time of saving, the method of collection and device info.
- This icon will not appear on Android devices; press and hold on the target file to open file information.

Send via E-mail
It is possible to open and view the selected recorded data with applications which can read CSV files. (View in spreadsheet software, send as e-mail attachments and so on)

Upload to Cloud
Data files downloaded via Bluetooth or direct WLAN communication can be uploaded to T&D WebStorage Service.
- Make sure your WebStorage account is added to the app. (Refer to [Usage by Communication Method] - [Accessing Cloud Storage] - [Set up a T&D WebStorage Service Account].)
- The uploaded files can be accessed from the [
 Download] menu of T&D WebStorage Service for graph view and download (in trz format).

Share Data
Tap here to open the Share/Save menu for your OS. (Icons may vary depending on the OS.)
- It is possible to open and view the selected recorded data with applications which can read CSV files. (View in spreadsheet software, send as e-mail attachments and so on)

Create Report
Data files downloaded via Bluetooth or WLAN direct communication can be output in a report.
Refer to [Graph Display and Operation] - [Report Creation and Output].
Warnings
You can check warning histories for devices configured with auto-upload to WebStorage and warning settings.
On the Device Info Screen, tap [ Warnings].
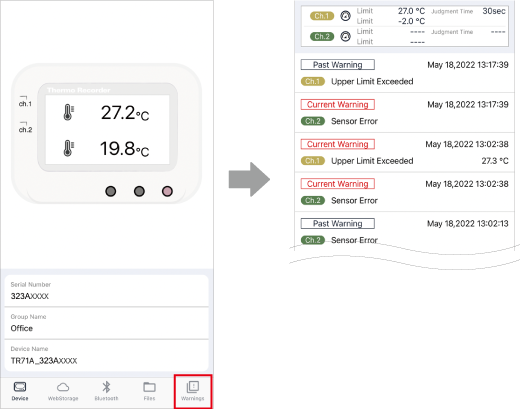
You can check warning histories on the T&D WebStorage Service as well.
Open a web browser and log in to your WebStorage account, and go to [![]() Alert View] - [Alert Log].
Alert View] - [Alert Log].
Open Warning History from Push Notification
Tapping on a received push notification will directly open the warning history of the target device.
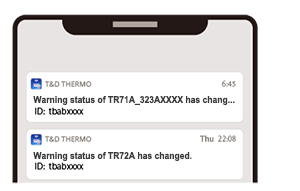
If you do not receive push notifications, please check the [Notification] settings on your mobile device.